In this post we’ll look at how to capture feedback messages from a Roco Z21 DCC Control Center. Feedback from a model train layout is a precondition for automated control, e.g. to avoid collisions.
Occupancy detection
One of the ways the Z21 gets feedback is via occupancy detection. The layout is divided into different sections that are electrical isolated. A feedback detector monitors for each section if there is something on the track that consumes energy. Usually that would be a locomotive, but it could also be a passenger coach with built-in lighting. If such rolling stock is detected, the section is occupied. Otherwise it is considered free.
Note that a “free” section could still contain rolling stock that does not consume any energy. So one has to be mindful with the design of the sections and how to interpret occupancy statuses.
The mission
We’re going to write a Python script that captures feedback messages from the Z21 while we drive a locomotive on the layout.
The setup
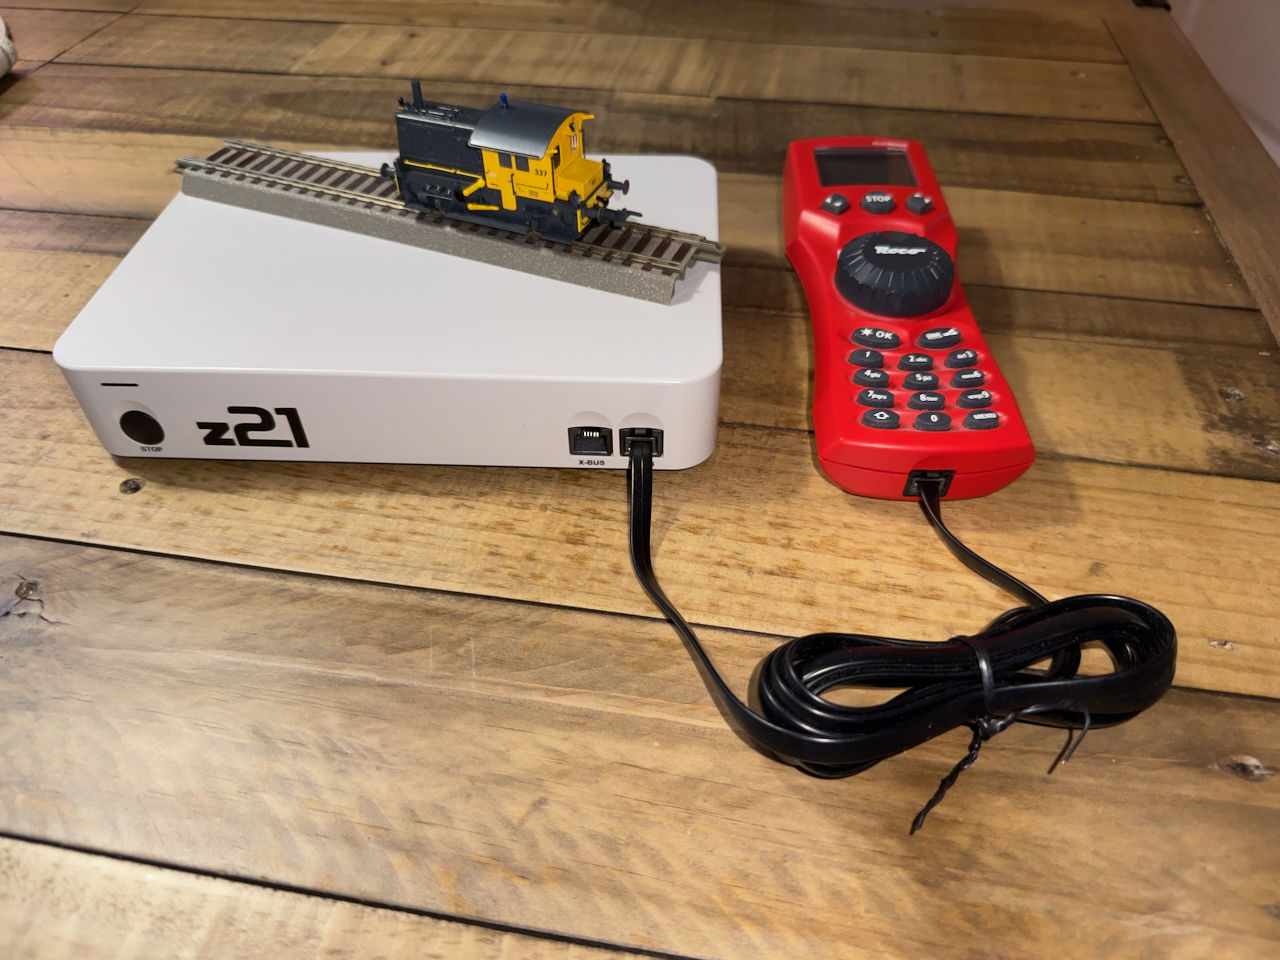
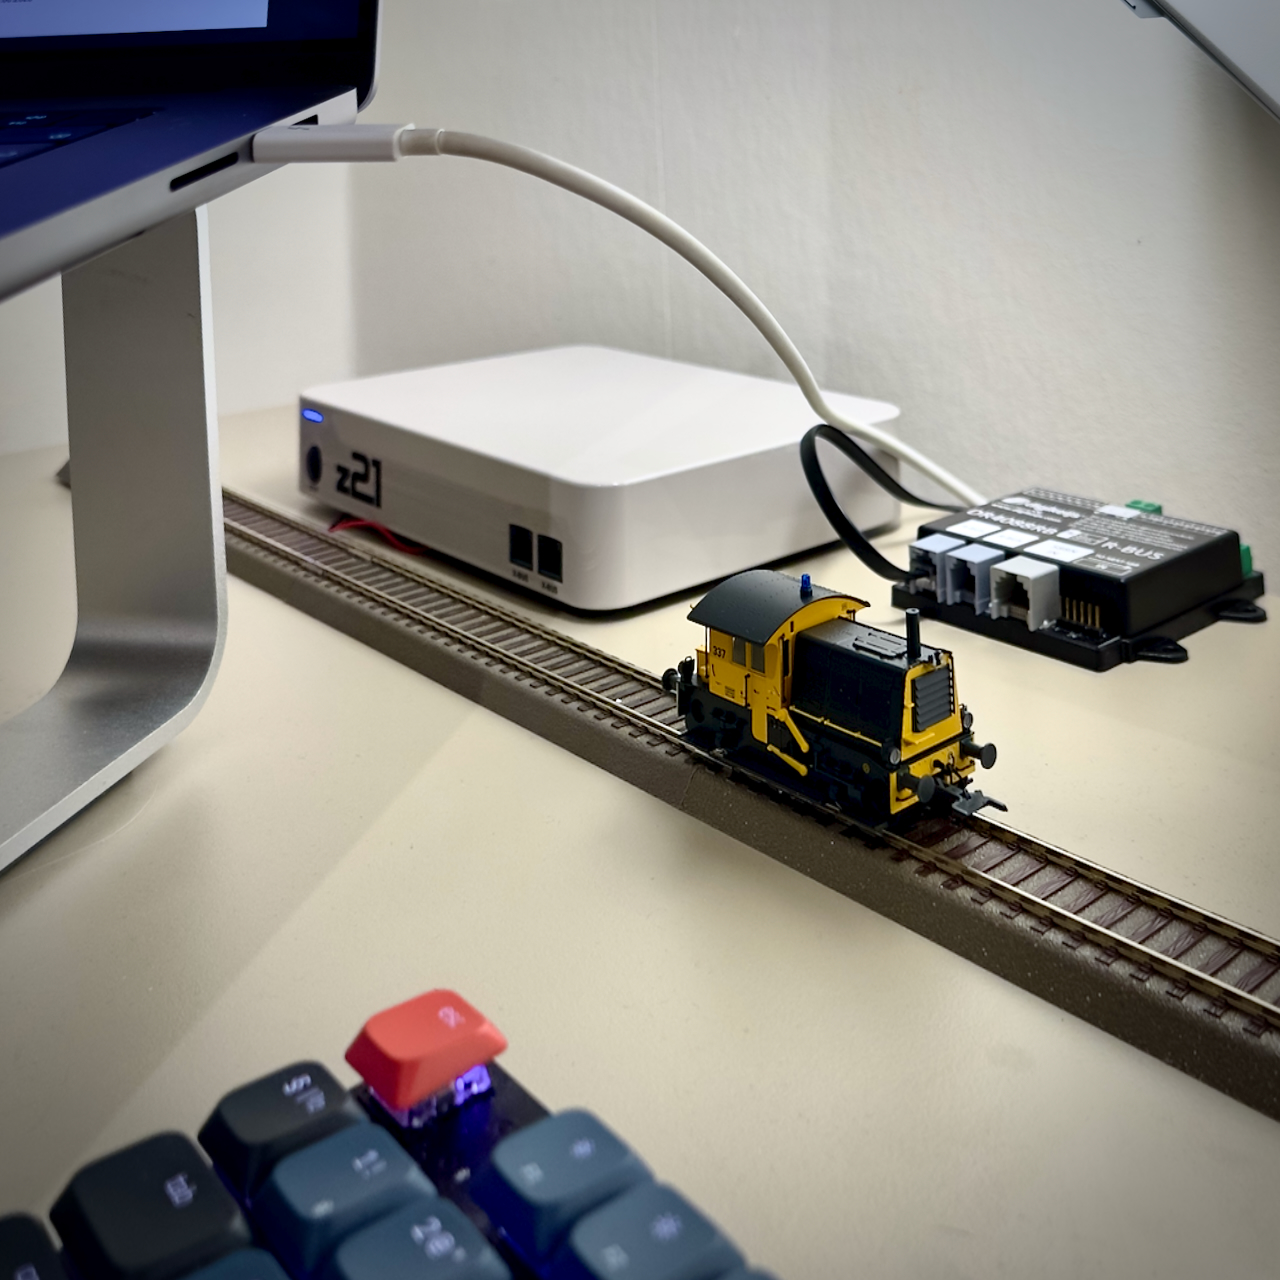
The setup consists of:
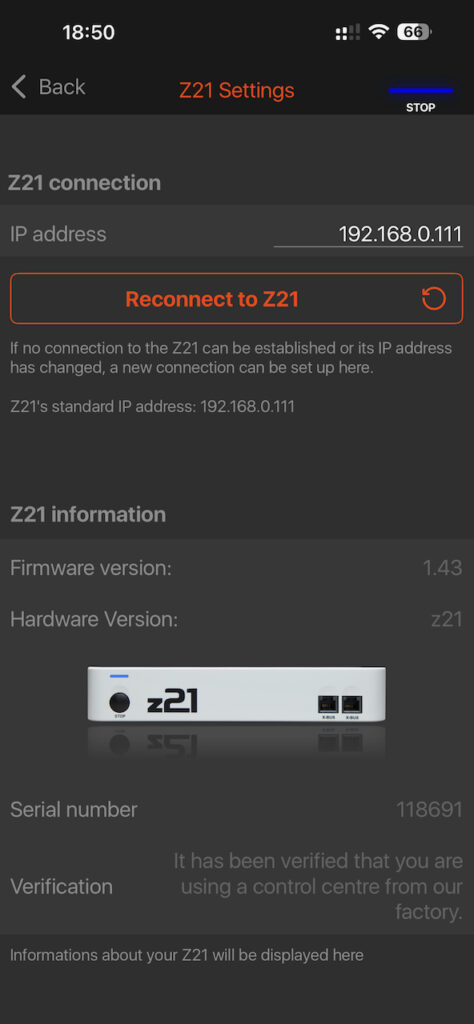
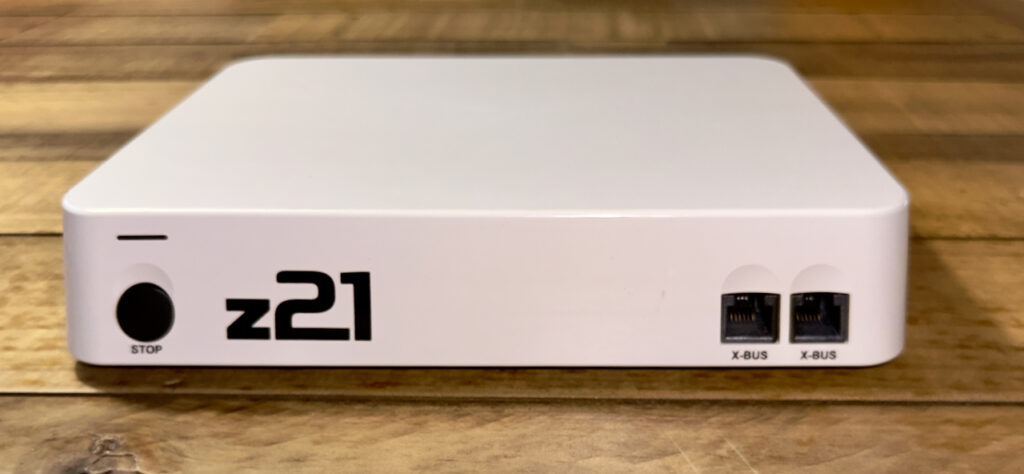
- z21 (white), directly connected to my home network, using the default IP address: 192.168.0.111,
- Digikeijs DR4088RB CS feedback module, connected to the Z21 via the R-bus and configured as module 1,
- A straight track of 1,5 meters, split in three more or less equal sections: west (section 1), center (section 2) and east (section 3),
- Apple MacBook Pro M1, running Mac OS 26.2 (Tahoe), connected to my home network,
- Python 3.14.1, using IDLE as the development environment,
- Apple iPhone 14, running iOS 26.2, connected to my home network and Roco’s Z21 app
- A locomotive with DCC address 03.
Note: Digikeijs is no longer in business. The feedback module is functionally comparable to the Roco 10819.
Let’s cook!
We’ll start off with the script that we created in the previous post, that:
- Creates the connection to the Z21
- Subscribes to feedback messages
- Creates the event loop
- Splits incoming messages into one or more data sets
- Prints the data sets to the console.
Note that we update the command for subscribing to feedback messages: the data section of the command shall be 0x00010002. Also, we print the data set type explicitly to distinguish between the different types that we may receive.
import socket

def dispatch(data_set):
    header = data_set[2]
    if header == 0x40:
        return dispatch_x(data_set)
    if header == 0x80:
        print("LAN_RMBUS_DATACHANGED")
        return handle_lan_rmbus_datachanged(data_set)
    print("unknown header")
    return "unknown header"

def dispatch_x(data_set):
    x_header = data_set[4]
    if x_header == 0x61:
        print("LAN_X 0x61")
        return "LAN_X 0x61"
    if x_header == 0xEF:
        print("LAN_X_LOCO_INFO")
        return "LAN_X_LOCO_INFO"
    print("unknown X-header")
    return "unknown X-header"

def split_data_sets(input_string):
    if len(input_string) < 2:
        return []
    first_data_set_length = \
        int.from_bytes(input_string[0:2], \
        byteorder = "little")
    first_data_set = \
        input_string[:first_data_set_length]
    remainder = input_string[first_data_set_length:]
    return [ first_data_set ] + \
        split_data_sets(remainder)

def handle_message(message):
    for data_set in split_data_sets(message):
        print("Data set: ", data_set)
        print("Data set type: ", hex(data_set[2]))
        dispatch(data_set)

s = socket.socket(socket.AF_INET, socket.SOCK_DGRAM)
Z21 = ('192.168.0.111', 21105)

data_len = int.to_bytes(0x0008, \
    2, byteorder = 'little')
header = int.to_bytes(0x0050, \
    2, byteorder = 'little')
data = int.to_bytes(0x00010002, \
    4, byteorder = 'little')
command = data_len + header + data
s.sendto(command, Z21)

while True:
    message, sender = s.recvfrom(1024)
    if sender == Z21:
        handle_message(message)
Running the script
We put a locomotive on the west section of the track and using the Z21 app we’ll drive it to the east section. When running the script in the mean time, we receive the following messages:
Data set:  b'\x0f\x00@\x00\xef\x00\x03\x04 \x00\x00\x00\x00\x00\xc8'
Data set type:  0x40
b'\x0f\x00\x80\x00\x00\x03\x00\x00\x00\x00\x00\x00\x00\x00\x00'
Data set type:  0x80
Data set:  b'\x0f\x00\x80\x00\x00\x02\x00\x00\x00\x00\x00\x00\x00\x00\x00'
Data set type:  0x80
Data set:  b'\x0f\x00\x80\x00\x00\x06\x00\x00\x00\x00\x00\x00\x00\x00\x00'
Data set type:  0x80
Data set:  b'\x0f\x00\x80\x00\x00\x04\x00\x00\x00\x00\x00\x00\x00\x00\x00'
Data set type:  0x80
Data set:  b'\x0f\x00@\x00\xef\x00\x03\x04\x00\x00\x00\x00\x00\x00\xe8'
Data set type:  0x40
Data set type 0x40 is an XPressNet message as we saw in a previous post. However, type 0x80 is new: the name of it is LAN_RMBUS_DATACHANGED, according to the protocol specification. Let’s update our dispatch function:
def dispatch(data_set):
    header = data_set[2]
    if header == 0x40:
        return dispatch_x(data_set)
    if header == 0x80:
        print("LAN_RMBUS_DATACHANGED")
        return handle_lan_rmbus_datachanged(data_set)
    print("unknown header")
    return "unknown header"

def dispatch_x(data_set):
    x_header = data_set[4]
    if x_header == 0x61:
        print("LAN_X 0x61")
        return "LAN_X 0x61"
    if x_header == 0xEF:
        print("LAN_X_LOCO_INFO")
        return "LAN_X_LOCO_INFO"
    print("unknown X-header")
    return "unknown X-header"
Apart from adding a few print statement, we have now added a check for the 0x80 header and will create a function for handling the LAN_RMBUS_DATACHANGED message.
Handling the feedback message
Let’s analyze these LAN_RMBUS_DATACHANGED messages further.
The structure of this message type is:
- DataLen: 0x0F, 0x00
- Header: 0x80, 0x00
- Group Index (1 byte), 0 or 1
- Feedback Status (10 bytes).
The feedback status is one byte per feedback module (assuming that the feedback module can handle 8 sections). Each bit within the byte represents a section of that module. The value for each bit is 1 if the section is occupied an 0 when it is free.
Since the feedback status is limited to 10 bytes, this data set can contain the status for up to 10 modules. If more than 10 modules would be used, the Group Index byte will be set, to signify the status of modules 11 to 20.
In our case, we are only interested in the module with address 1. This means that group index should always be 0 and we look at the lowest three bits of the first byte in the feedback status. Since we only have a single module in our layout, we can assume that Group Index is always 0.
The function could look like this:
def handle_lan_rmbus_datachanged(data_set):
    group_index = data_set[4]
    feedback_status = data_set[5:]
    if int.from_bytes(feedback_status) == 0:
        return
    module1 = feedback_status[0]
    section1_occupied = (module1 & 0b00000001 > 0)
    section2_occupied = (module1 & 0b00000010 > 0)
    section3_occupied = (module1 & 0b00000100 > 0)
    if section1_occupied:
        print("West occupied")
    if section2_occupied:
        print("Center occupied")
    if section3_occupied:
        print("East occupied")
    return
And the output:
Data set:  b'\x0f\x00@\x00\xef\x00\x03\x04 \x00\x00\x00\x00\x00\xc8'
Data set type:  0x40
LAN_X_LOCO_INFO
Data set:  b'\x0f\x00\x80\x00\x00\x03\x00\x00\x00\x00\x00\x00\x00\x00\x00'
Data set type:  0x80
West occupied
Center occupied
Data set:  b'\x0f\x00\x80\x00\x00\x02\x00\x00\x00\x00\x00\x00\x00\x00\x00'
Data set type:  0x80
LAN_RMBUS_DATACHANGED
Center occupied
Data set:  b'\x0f\x00\x80\x00\x00\x06\x00\x00\x00\x00\x00\x00\x00\x00\x00'
Data set type:  0x80
LAN_RMBUS_DATACHANGED
Center occupied
East occupied
Data set:  b'\x0f\x00\x80\x00\x00\x04\x00\x00\x00\x00\x00\x00\x00\x00\x00'
Data set type:  0x80
LAN_RMBUS_DATACHANGED
East occupied
Data set:  b'\x0f\x00@\x00\xef\x00\x03\x04\x00\x00\x00\x00\x00\x00\xe8'
Data set type:  0x40
LAN_X_LOCO_INFO
This is to be expected:
- The locomotive starts in the west section. Since the message is only received upon a status change, there is no initial message that the locomotive is there.
- We then start driving, hence the LAN_X_LOCO_INFO message.
- When the locomotive starts and enters the center section, it has not yet left the west section. So it occupies both section.
- As the locomotive proceeds, it leaves the west section and only occupies the center section.
- Then the locomotive enters the east section without yet leaving the center section.
- Eventually the locomotive leaves the center section and occupies only the east section.
- Finally, we stop the locomotive and therefore we see another LAN_X_LOCO_INFO message.
Note: after running some tests with different locomotives, I noticed that in some cases a lot of messages were received where all sections were marked as free. This is incorrect and they were immediately followed with correct messages. I’m not sure if this is a problem with the feedback unit, too small current drawn by too small a locomotive or something else. In order to avoid unwanted effects, I added a filter that ignores messages with no occupied sections.
Conclusion
We can now receive where the locomotive is on the layout at any time. Based on this information we can decide what we want the locomotive to do. Once we know how to control the locomotive, which we will discuss in a next article, we have all preconditions in place for fully automated train control!